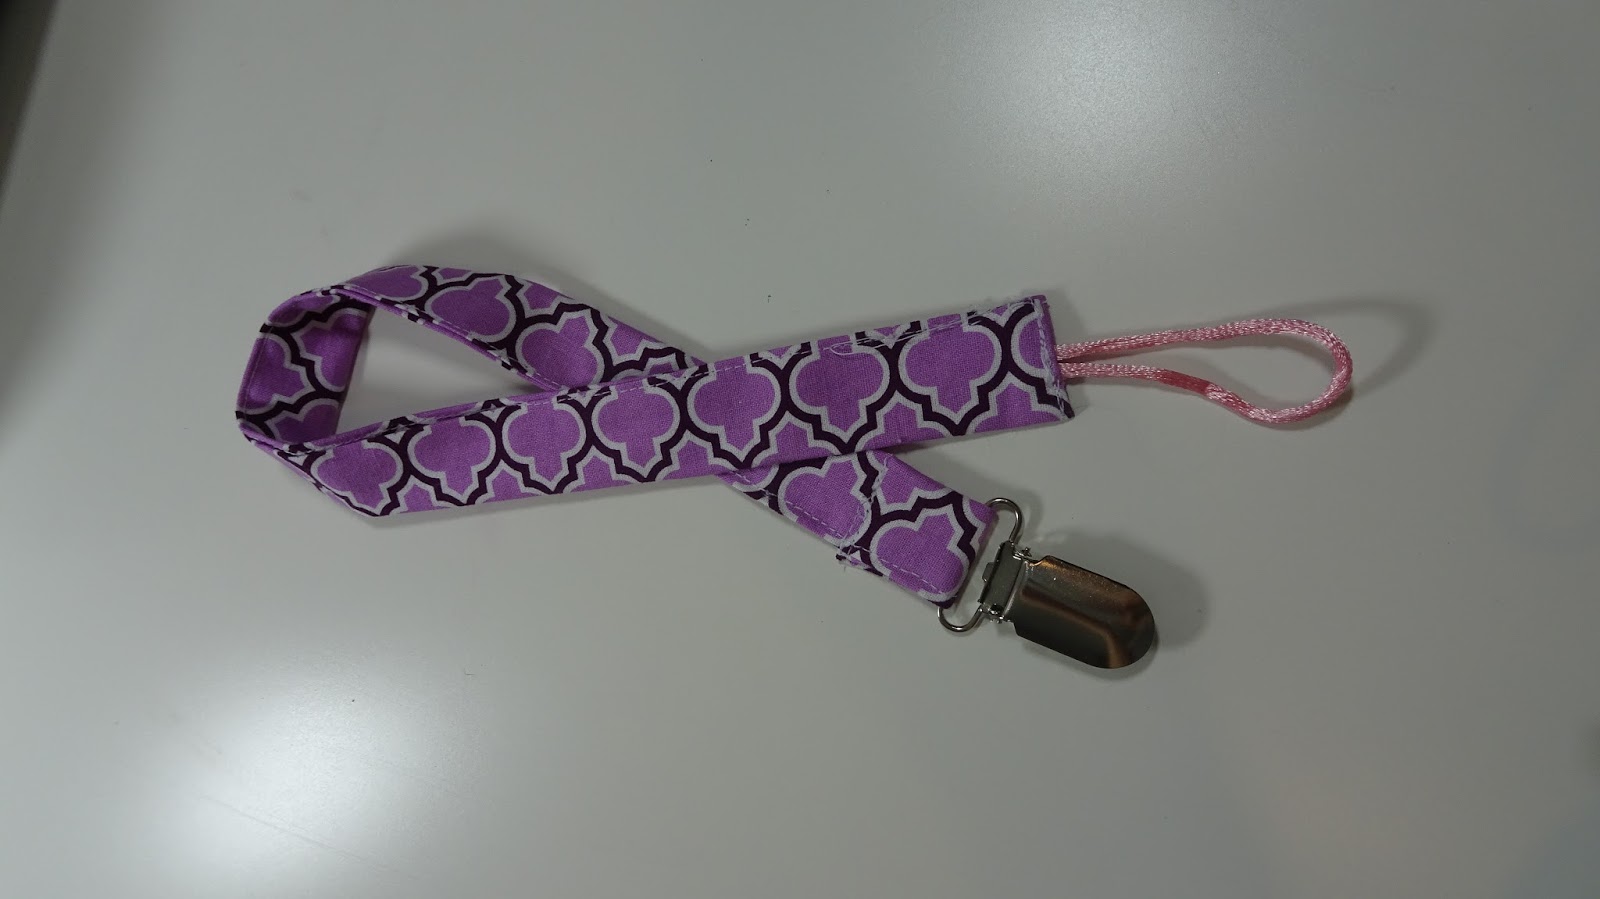
Super cute Fabric pacifier toy Clip
Things you will need
Fabric
Suspender clip
Sewing machine
some sort of cord - i used a silky cord from the childrens beading isle of michaels
Iron is pretty essential

cut a piece of fabric 15" x 3"

Iron the fabric as if you are making bias tape, fold either side in about a 1/4" and press

Fold again and line up the edges and press, you will sew down the one end to close it up

grab your suspender clip and place the fabric through the clip and fold twice to hide the raw edge and sew across, place the fold about an inch from from the clip so you dont get your suspender clip stuck under your presser foot or accidentally hit it with your needle
go back and force over this stitch to create a secure bond


This is the cord i found at michaels, this is what the kids use with pony beads, its nice a soft and holds up very well over time! im very impressed with this actually lol
Cut about 3" in length

if you have sew straight to the end of the fabric, stitch rip it about 3/4" so you can fold down the edges and place the cord inside (can be a little tricky getting it all nice but not impossible! hehe)
carefully place in sewing machine and put the needle in the centre to secure the cord first and then go back and force a bunch to make sure its a secure stitch and then back down the long edge to stitch up the part you stitch ripped previous

and then thats it!
I prefer to use a cord because sometimes you only have a small hole to put it through to secure it to the pacifier and also you can put it around a cup or a toy to prevent those items being toss from the carriage
So if your making these for a new mom make up a bunch so she can secure lots of things to the carriage as
check out my video tutorial too if your stuck!
follow me on instagram, twitter, facebook @charmedbyashley


No comments: